


Change Your Trading Fortunes With A Risk:Reward (R:R) Based Game Plan
Read this article to the end, read it again if need be, as we’re going to give you the secret sauce required to become a profitable trader. Let’s begin…
Trading is a game of ‘tug of war’.
You nail some trade setups and pull in some sweet wins, but then the market pulls back some of those gains when you get things wrong. This constant emotional struggle defeats many traders over the long haul simply because they don’t have a solid game plan in place that allows them to lose.
Losses are unavoidable in trading so as a professional trader there is only 1 thing you can do. Embrace losses into your long-term trading goals by containing them within a strict R:R based trading system.
R:R is simply a measure of how much you stand to lose (Risk) vs how much you stand to gain (Reward) with any given trade setup. If you stick to only taking trades where you win twice as much as you lose each time then even with just a 50% win rate you can be profitable…
| 10 trades at 1risk:2reward |
|---|
|
5 x $2,000 win |
|
5 x $1,000 loss |
|
= $10,000 won - $5,000 lost = $5,000 profit across 10 trades despite losing half of them! |
If you’re comfortable losing half of your trades knowing that in the long run you will still make profits it sure does take the pressure off! You can learn more about all of this by signing up for a PRO account and reviewing our free trader training plan ‘The Pro Trader 5x Blueprint’.
How ProfitFarmers Makes Risk:Reward Trading Easier Than Ever Before
We recently launched some new features designed to help you identify trade opportunities that fit your long term trading goals without putting your account at risk.
NOTE: The larger the R:R, the better the trade. We divide the rewards by the risk. Eg $1000 if you win divided by $300 if you lose = 1000/300 = 3.33Reward. Other traders will do the same calculation but focus on the risk i.e 300/1000 = 0.3Risk. We think it’s easier to understand where we report on the possible reward multiple. But ultimately it’s the same thing!
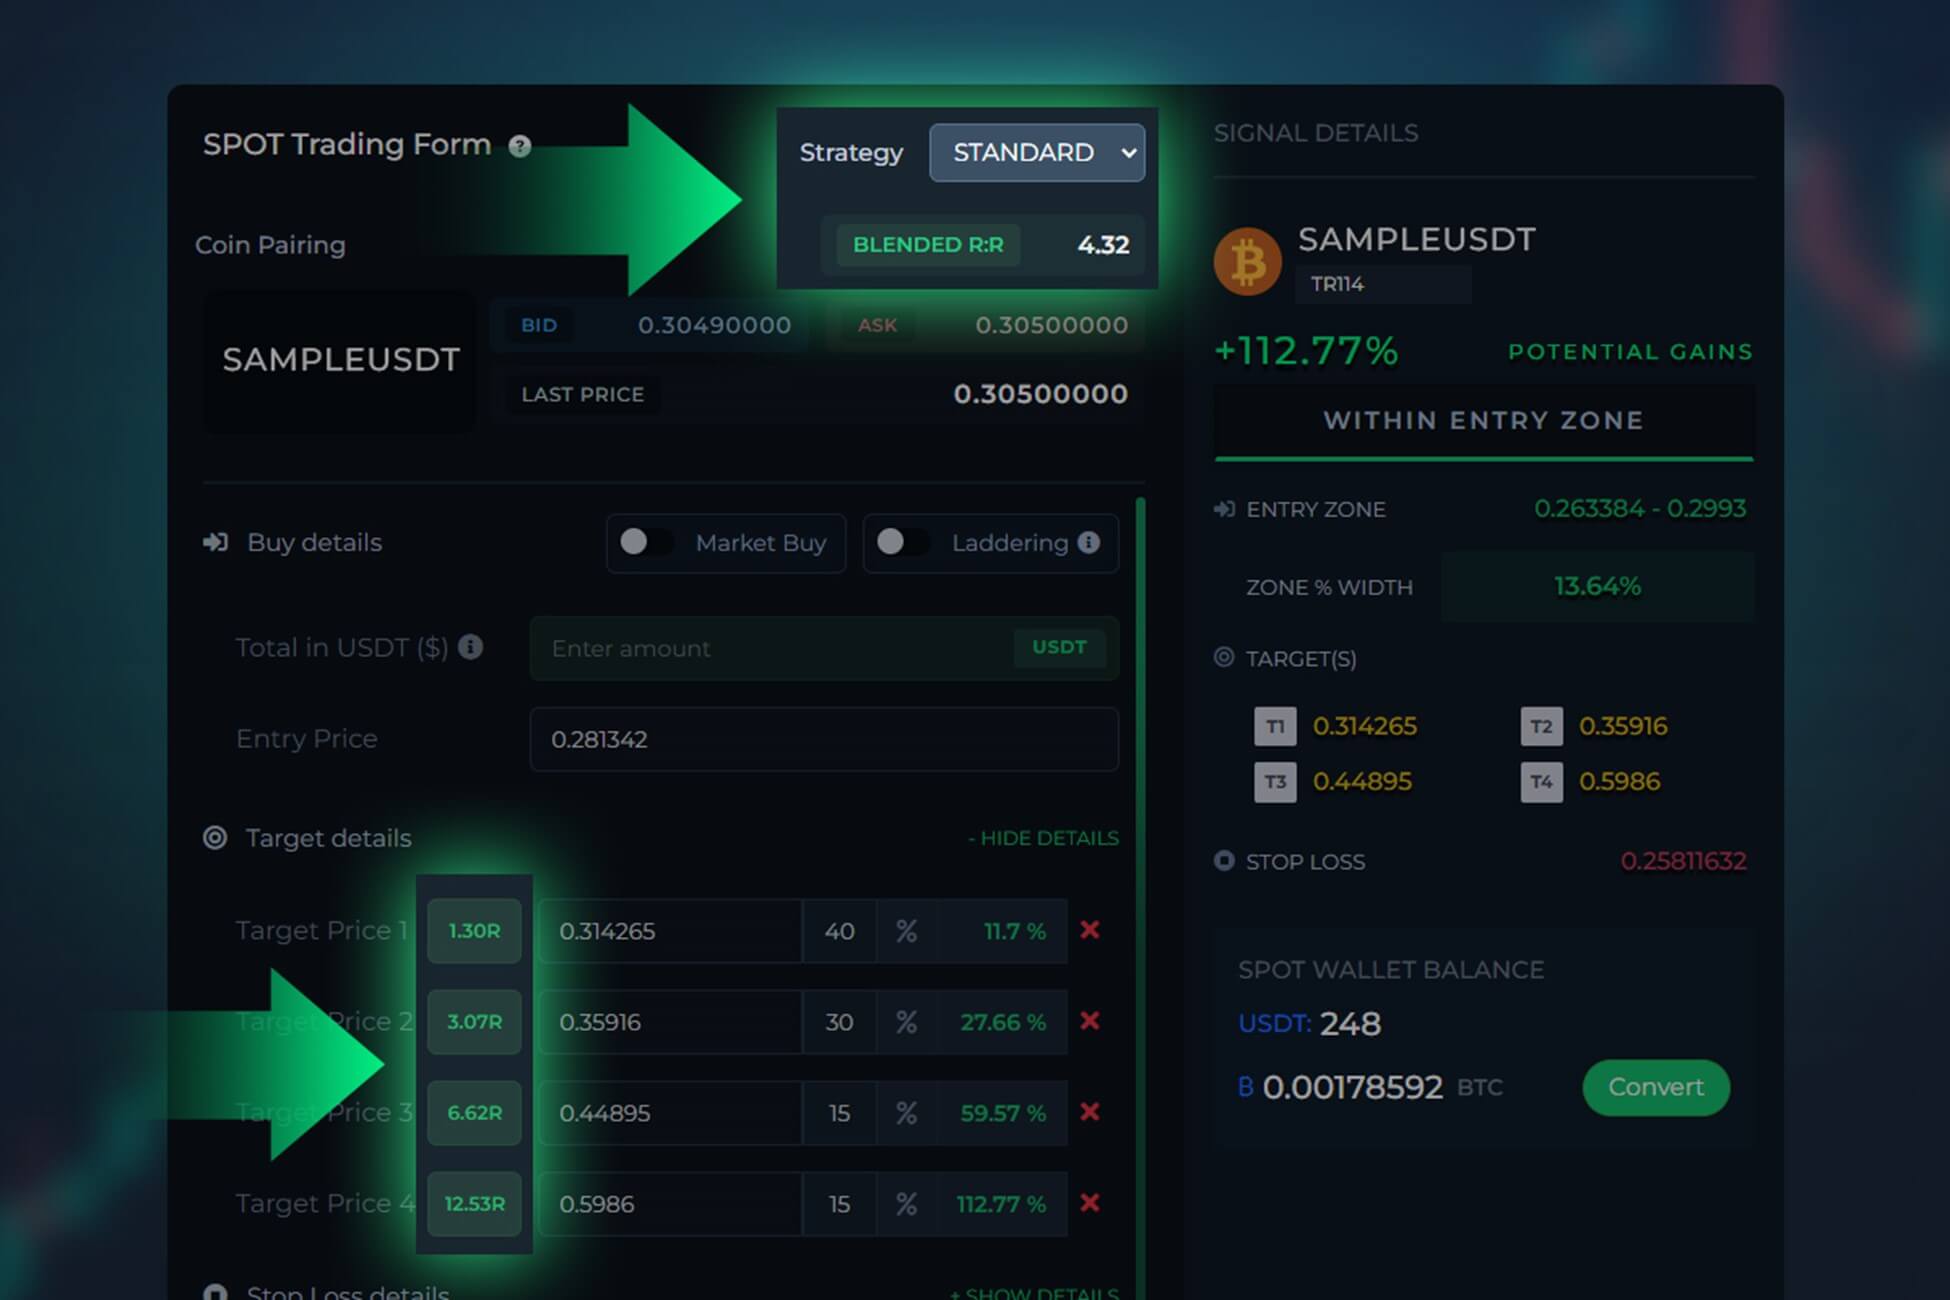
R:R Traffic Light System
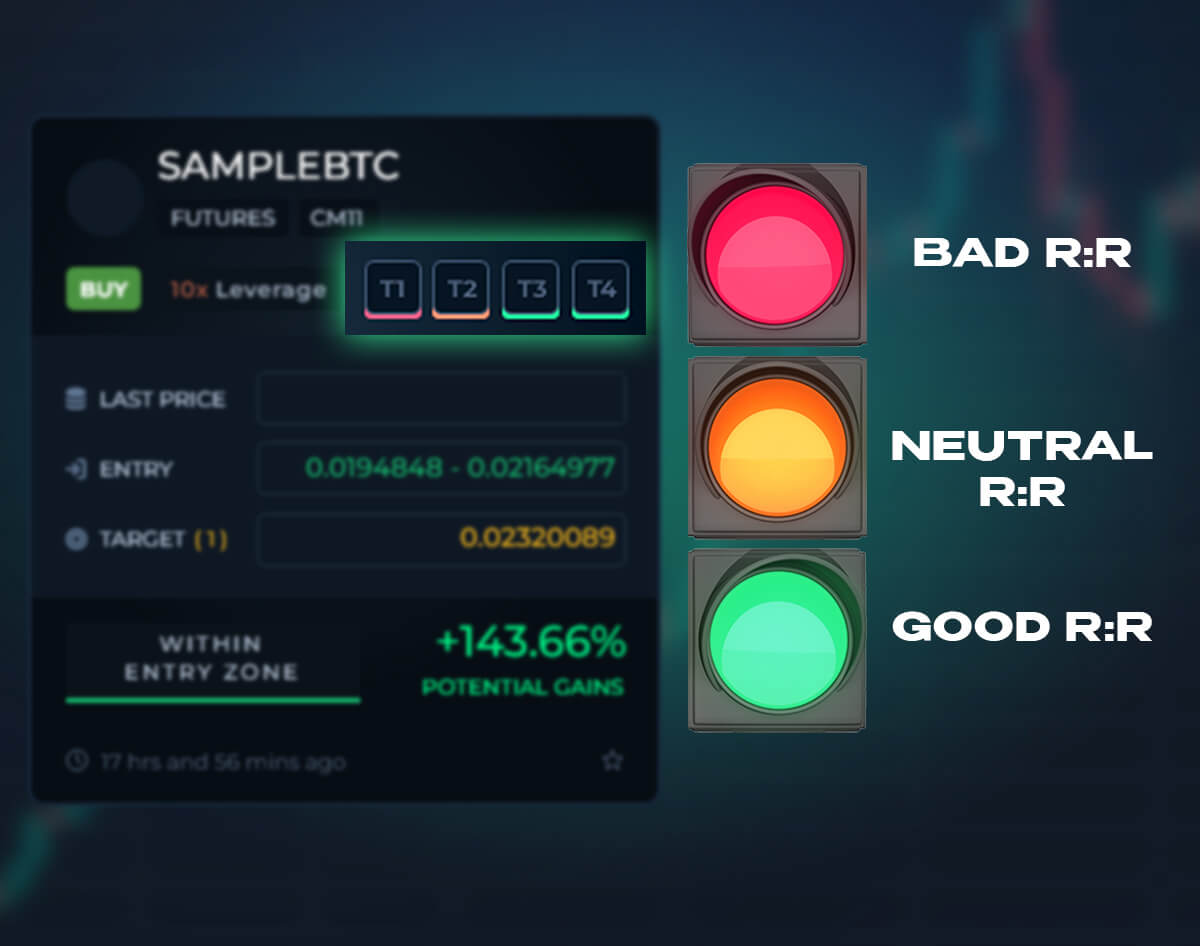
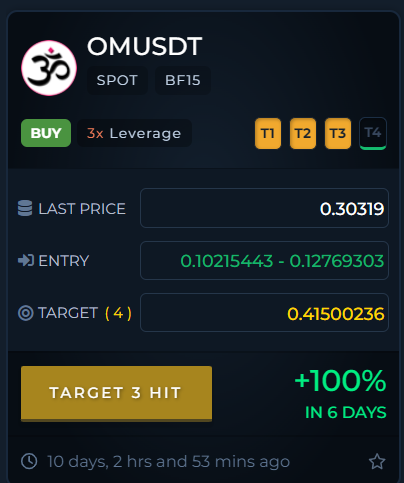
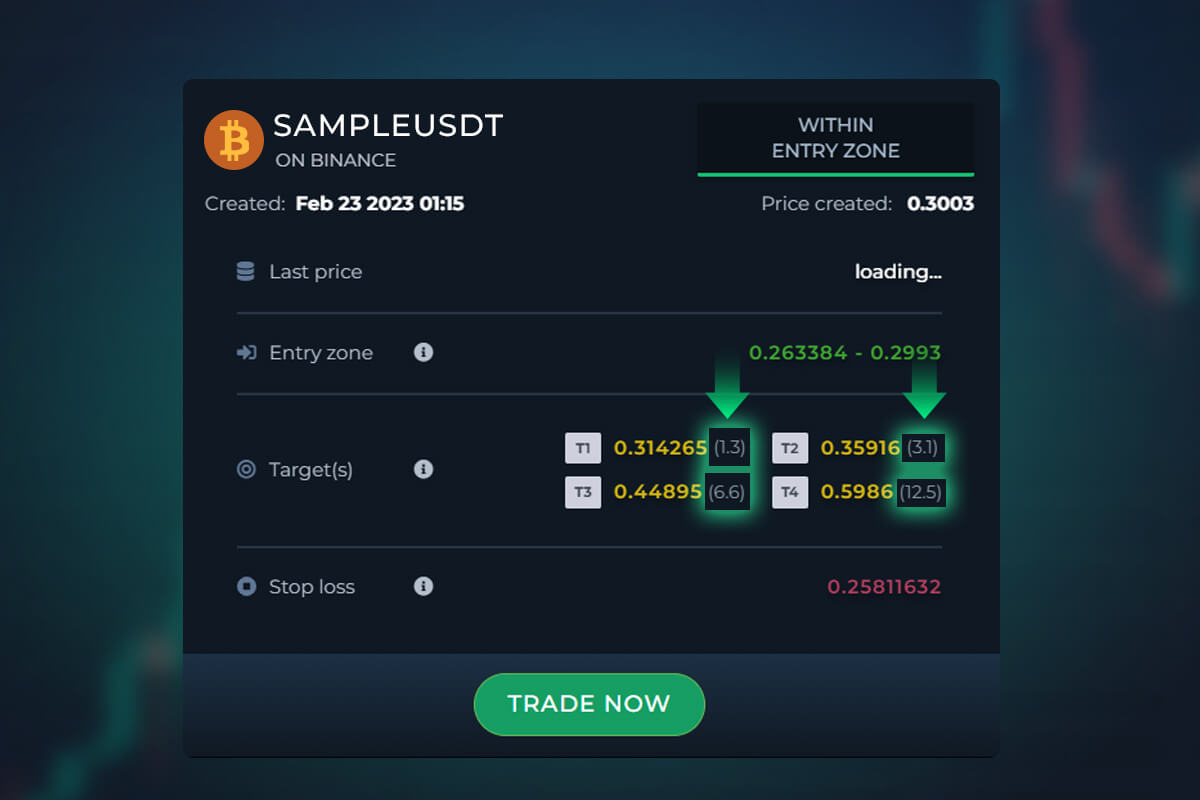
When a fresh trading signal arrives on the dashboard you’ll see some color coded markers underneath each take profit target.
It’s simple to understand:
- Green means the R:R opportunity looks great from the suggested entry zone to that target.
- Orange means it could be good but you may need to edit your trade order a little bit to make it work.
- Red means the opportunity doesn’t look good at first glance, but with some tweaks you might be able to salvage something.
If you want to know the exact rules behind the colors click here to expand these description boxes.
Rules for the color coded targets:
- If R:R at Tx >/= 2 then Green highlight to the target box
- If R:R at Tx >1.5 but < 2 then Orange
- If R:R at Tx </= 1.5 then Red
- If R:R at Tx >/= 3 then Green highlight to the target box
- If R:R at Tx >2 but < 3 then Orange
- If R:R at Tx </= 2 then Red
- If R:R at Tx >/= 5 then Green highlight to the target box
- If R:R at Tx >4 but < 5 then Orange
- If R:R at Tx </= 4 then Red
- If R:R at Tx >/= 6 then Green highlight to the target box
- If R:R at Tx >5 but < 6 then Orange
- If R:R at Tx </= 5 then Red
Individual R:R and Blended R:R
Once you’ve identified a signal that smells interesting you can open up the trade form in order to customize your exact plan of attack.
Here’s where things get very interesting…
The trade form now calculates your reward to each target based on your chosen entry prices. That’s pretty cool as it helps you instantly understand how to modify your trade in order to capture the gains you are looking for vs the risk you’re happy with.
But we’ve taken it a step further.
At the top of the trade form you’ll now see what we call the ‘blended R:R’. This is a calculation of the exact R:R your specific trade plan is going to capture. This number will change each time you adjust your plan.
This way you can play around with adding/removing entries, targets or even moving your stop loss and get instant feedback on whether you’re creating a professional trade plan that suits your long term goals.
Our members are already raving about this new feature, why don’t you sign up and give it a try for yourself!
New Preset Strategies
To make things EVEN EASIER we’ve revamped the preset strategies on the drop down list you find at the top of the trade form. These options rearrange your trade form into some different approaches with a single click.
Goodbye ‘Defensive’, ‘Standard’ and ‘Aggressive’, but say hello to (click each name to expand and learn more):
Remove 5th ladder and split entry 25% in each remaining. T3 and 4 are removed. Coins split T1 50%, T2 50%
Use when you are hunting a good R:R trade but don’t expect higher targets to be reached. Adjust your take profit split based on the Rewards at T1 and T2. For example if you can achieve your required R at T1, then sell all/most coins at T1.
No laddering mode, Target 1 and Target 2 only split 40/60, Breakeven mode entry only.
Use when you are sniping an entry for perfect R:R whilst watching the charts. Don’t forget to adjust your stop loss to reduce your risk if you can identify a tighter stop loss position.
Remove 5th ladder and split entry 25% in each, Breakeven OFF, all other settings standard. T1 = 15% T2 = 35% T3 = 15% T4 = 35%
Use when you expect larger breakout moves or trend continuation. This setting aims to ride the trend to higher targets with no risk of being knocked out of the trade early.
Adjust your stop loss manually as your trade progresses if you want to avoid unnecessary loss on market dump.
Remove 5th ladder and split entry 25% in each, Breakeven 2 steps behind, all other settings standard. T1 = 30% T2 = 40% T3 = 10% T4 = 20%
Use when you expect decent breakout moves or trend continuation. This setting aims to ride the trend to higher targets and the breakeven 2 steps behind means only a small chance of being knocked out of the trade early.
Remove ladder 4 and 5 – Split Entry 30% 40% 30%. Move default stop loss up to 5% lower than this new average entry price. Breakeven standard. All targets as normal.
Use when you want to get into a trade but don’t like the default R:R. This plays the odds that a winning signal will not likely come lower than 50% entry depth if it is going to eventually hit T1+.
We suggest removing higher targets during choppy trading periods to focus on capturing more probable gains at T1/T2.
Remove 3rd, 4th, 5th Entry Ladder – split coins 40 on the 1st ladder /60 on the 2nd. Move stoploss to the price of the 4th Ladder. Target 1 only.
This strategy aims to grow the account by consistently executing good R:R trades with a very high win-rate. Add higher targets, especially at least target 2, when you expect the market to run.
Remove 5th entry ladder 25/25/25/25 in remaining entries. Remove target 1, 2 and 3. Sell 100% at T4
Use this strategy when you want to take a punt on an altcoin doing a huge breakout, viable during bullish trading periods. Reduce your position size when doing this as this is a lower probability setup but the gains are so big, even a small bag is a massive profit!
Use this at your own risk. Fills the role of the old standard strategy. Most of the time you don’t want to use this but we have to make something the default
These strategies are not the ‘be all, end all’. These are designed to get your brain juices flowing and show you some different ways you could try to approach a signal.
Remember that you’ll need to take into account what the wider market is doing and look at how other signals have been performing recently to give yourself some idea of what to aim for.
Think you have an epic trade form setup that the other members could benefit from? Get in touch with support via your dashboard and tell us all about it! We’ll name it after you!
PRO Tips for Traders Who Want to Crush Their Competition
Remember, as our signal win rates are often 70% or higher, you don’t need to throw away all trade opportunities that have less than 1:2R. Take a look at these examples:
| 10 trades at 1risk:1.5reward |
|---|
|
7 x $1,500 win |
|
3 x $1,000 loss |
|
= $10,500 won - $3,000 lost = $5,500 profit across 10 trades if you win 70% of the time. |
Or how about this
| 10 trades at 1risk:1reward |
|---|
|
6 x $1,000 win |
|
4 x $1,000 loss |
|
= $6,000 won - $4,000 lost = $2,000 profit across 10 trades if you win 60% of the time. |
There is a direct relationship between win rate % and the R:R required to be profitable over time. Use this knowledge to craft smart trades from almost all signals our algorithms spot. Continue reading to learn more!
What About Those Higher Targets? Are They Worth Shooting For?
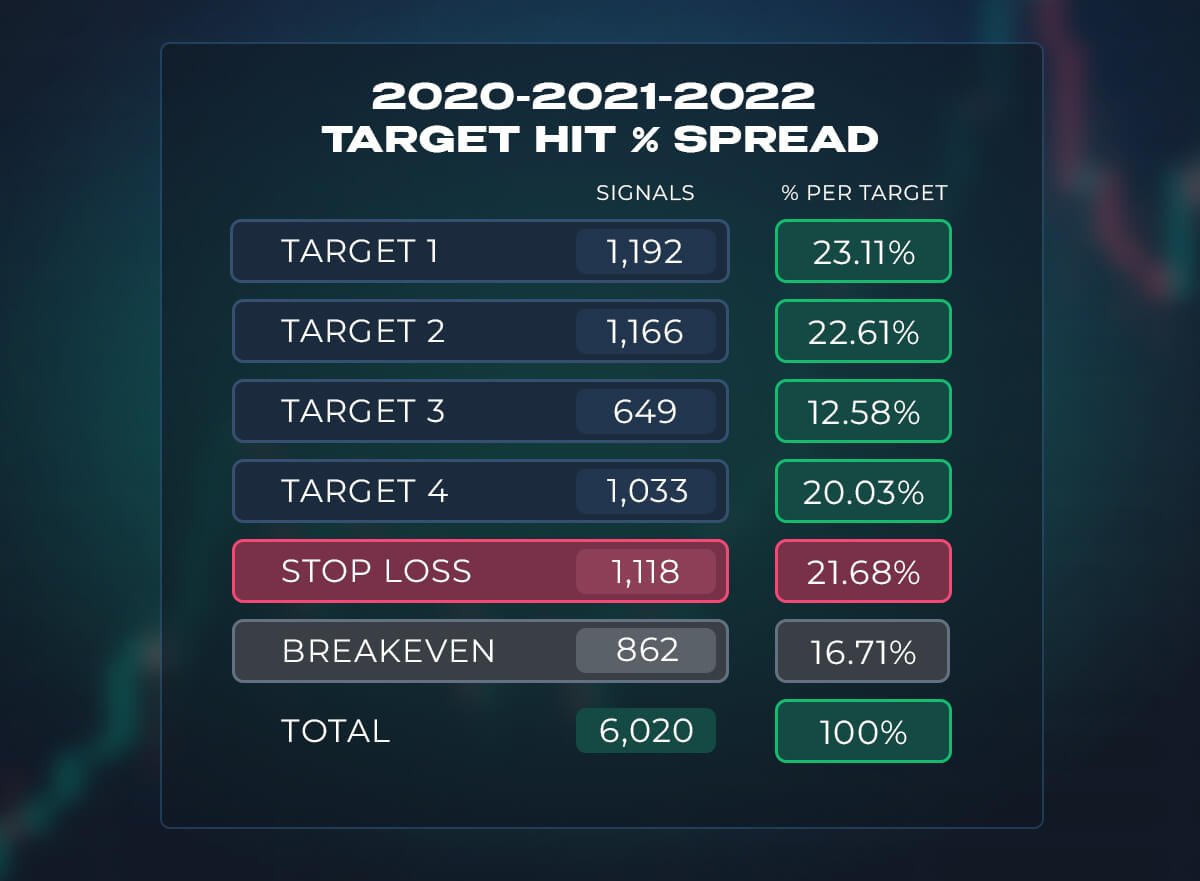
Take a look at the table above. It covers 3 years worth of signal data involving over 6000 completed signals.
It shows you the % of signals that made it to T1/2/3/4 or hit stop loss or were closed early (generally a draw or breakeven).
As closed early trades are not a win or a loss, we remove them from our win-rate / target hit calculations so that we can get a clear view of what is happening to the trades are able to run their course. We call those ‘completed trades’.
A quick explainer is needed:
If a trade made it to target 4, then it also made it to Target 1,2,3 on its way there. So you sum up the %’s of T1/2/3/4 to figure out how many signals made it to T1. In this case that’s 23.11%+22.61%+12.58%+20.03% = ~78% chance to have hit Target 1 when choosing any of our completed signals in the last 3 years.

Following the same logic, you had a 55% chance of hitting target 2 over the last 3 years.
What this should tell you is that, when the market isn’t totally horrible, it can make sense to involve target 2 in your trade setups.
Target 3 was achieved 32% of the time and Target 4 hit 20% of the time. That might not sound amazing but consider the fact that those targets often come with 50%-200% gains…
During uptrends, putting some small trades sizes out there aiming for higher targets can pay back big time.
R:R and Win Rates
Take a look at the following table, it gives you an idea of what sort of R:R you need to look for depending on the expected win rate of the trade setup or strategy you are using.
We’ve used round/simple numbers because as you’ll notice, as long as you are aiming for 1.5-3R, you shouldn’t really be having any trouble in the long run, even if you make tons of mistakes!
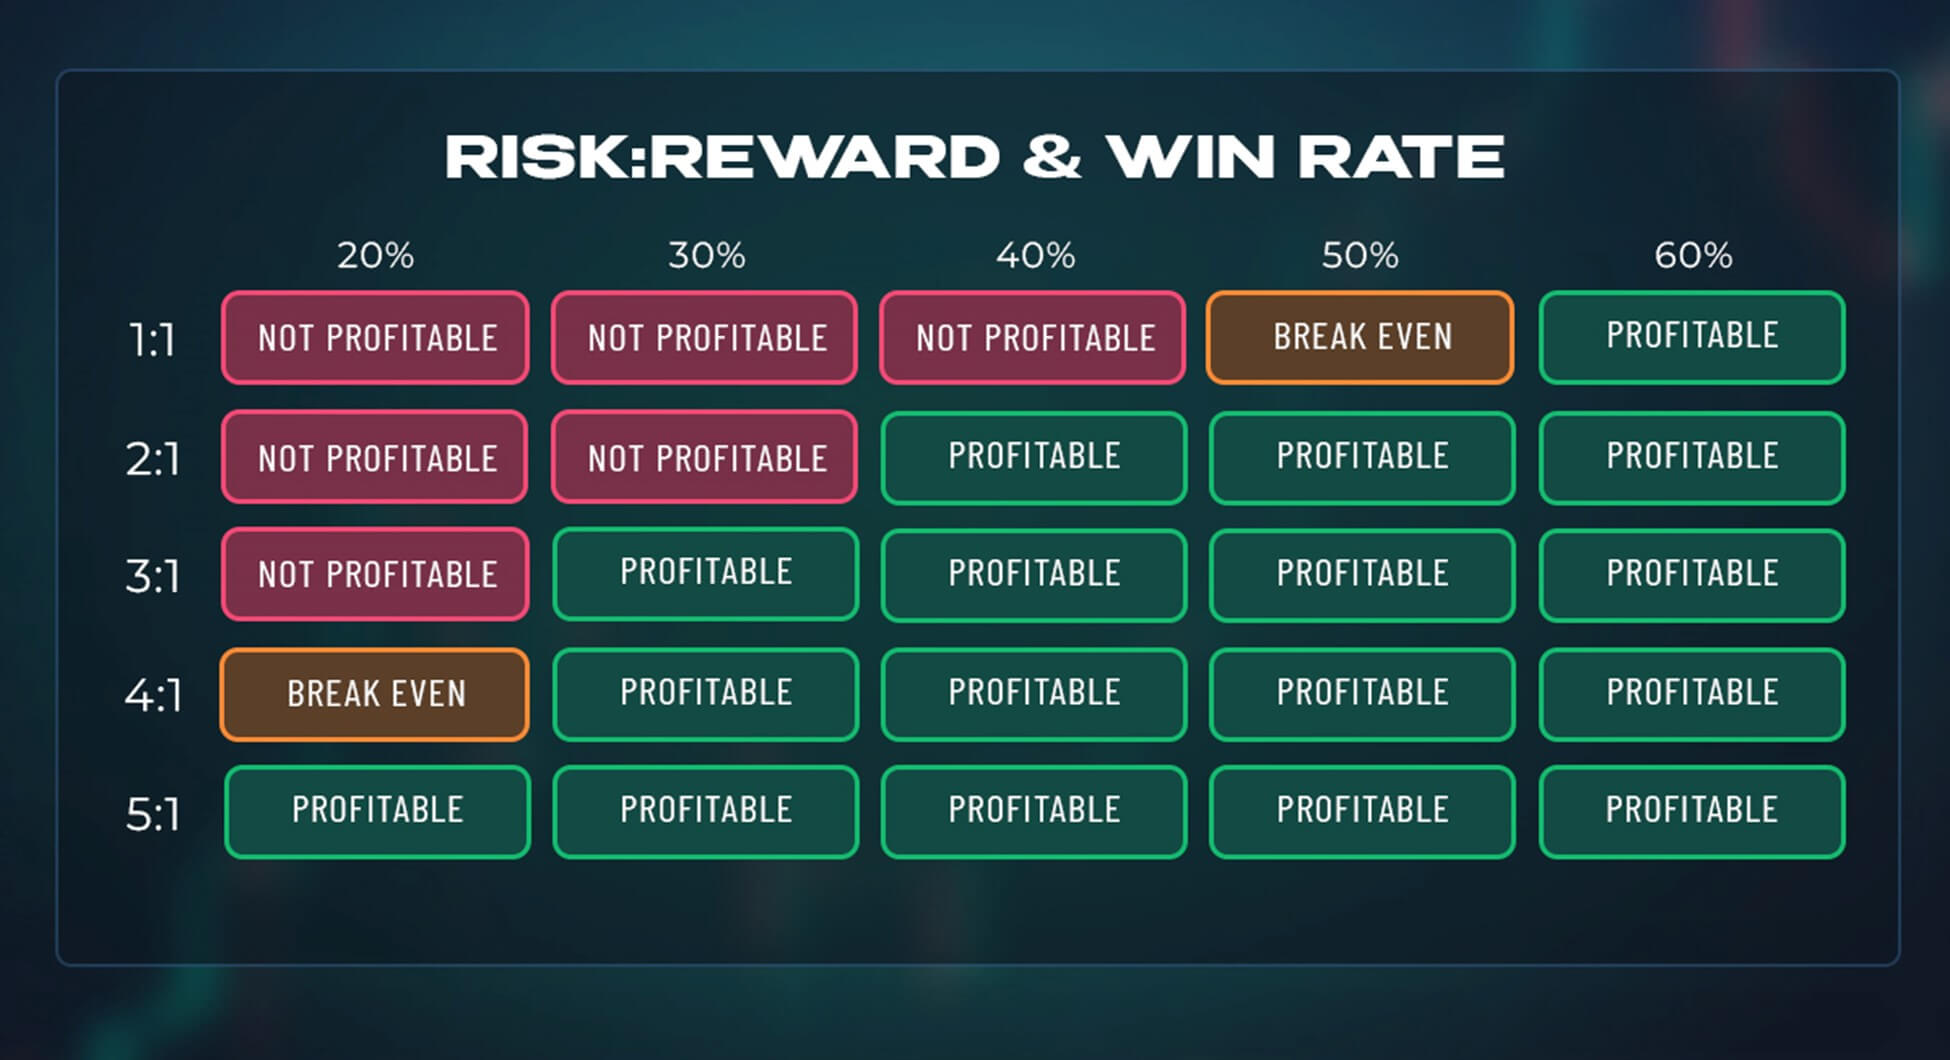
Let’s combine what we learned about the historical signal data with our knowledge of R:R.
Say you have a setup that can earn you 10R at target 4. During the right market environment, based on historical data you have a 20% chance of achieving your target.
According to the table above you need more than 5R to be profitable on a setup like that in the long run so this trade idea looks good!
Another example, you can achieve 4R at target 2 and you feel like it’s 50/50 whether you will achieve it. According to the table above you only need 1.5+R in order to be profitable over time. Looks like a good trade!
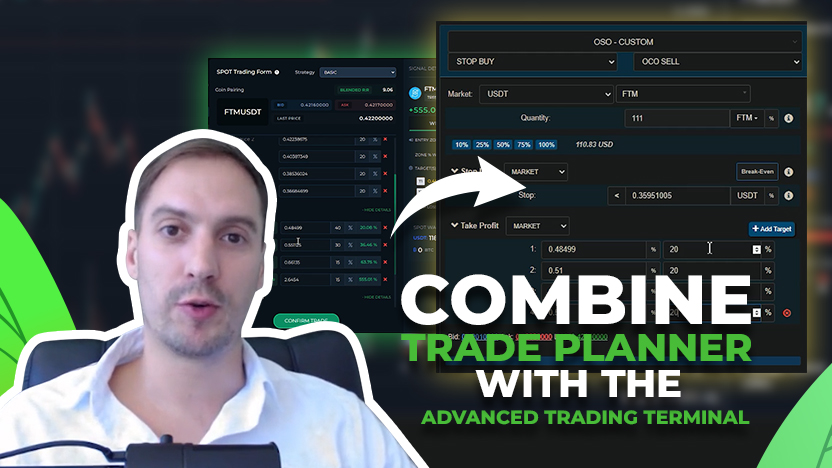
Did You Know? – You Can Create Multiple Trade Plans on the Same Signal?
Profitable Trading Isn’t About Winning, It’s About Math and Discipline
To finish up this article we wanted to drive a single point home. Stop worrying about losing your trades. If you have a strategy with a given win rate %, all you need to do is focus on finding trades with the correct R:R using that strategy.
Now, most traders don’t have a proper strategy, they just make it up as they go along and have no idea what the win-rate of their trade idea should be before they pull the trigger. Don’t be that person.
Fortunately ProfitFarmers takes care of finding reliable trade strategies for you! Our signal algorithms are updated frequently to adapt to current market conditions which is why our win rates are so high year after year no matter what market cycle we are in.
If you’ve read and understood this article, you’ll be ready to sign up for a long term PRO plan immediately. If not, you really do need to go back and read this as many times as it takes until you feel like you got it. Seriously…
Sign Up Now & Start Using ProfitFarmers 100% Free
The Only Thing You Have to Lose is Your Time. We aren’t lying.
By now, you know what you’re getting:
- 78% win-rate Trading signals*
- Copy-Trading
- Trade Guardian
- Laddering (you don't have to sit at your computer all day to protect your money)
- Market Intelligence
All 100% free – no time limit. You’ve got nothing to lose.
It’s like you’re getting a crypto supercomputer with decades of experience to sit over your shoulder and help you trade – all for free.
Sign up for ProfitFarmers now, and you could be using our trading terminal 100% free in just a few minutes.
*NO CREDIT CARD REQUIRED


